
Today I'd like to share my one of my monthly
creations for the SCRAPTIVATE store.

A few of you may have seen this,
and/ or fought over who'd own it over on FACEBOOK LOL
but I have posted it here with some better photos for you to see.
and maybe after it has a little "holiday" at SCRAPTIVATE
we can organise a lil give away?!!!
:)

PRODUCTS USED: 7 Gypsies Printers Tray and glass vials, German Scrap ( the glossy black vine trims and and accents) Graphic 45 Steampunk debute patterned papers, Golden gel medium, Tim Holtz Distress stains, alcohol inks, crackle paint and tissue tape , *Adirondack Acrylic paint daubers (may FAV things!),Tsukineko pigment ink pads and walnut antiquing ink spray, Tattered Angels Glimmermist, black embossing powder, mini paper roses, Scraptivate assorted metal charms, music paper, watch parts,wire...
A couple random rubber stamps including the quote i don't know the name
of and small Prima Bella, and Crafty Secrets clear stamps ...
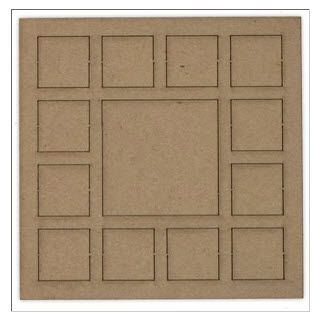
SCRAPWARE CHIPBOARD: flourish butterfly /tiny butterfly/flourish dragonfly/ tiny dragonfly/cog/keys and keyhole/Fancy Brackets, ATC bases, the outer chipboard packaging of Scrapwares mini baroque trim/Chippy Slides and the inner squares from the Scrapware Minchie Set
but the
stars of the show were....
***{ drumroll... }***

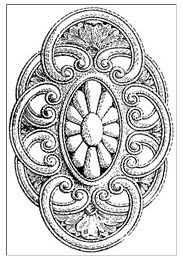
The FIMO Air Dry White Clay and the Lablanche Stamp
each of the tiles used in the tray were created using the FIMO clay on Scrapware chipboard;
the minchie pieces , the slide shapes and the ATC bases.
After playing for a while I developed an easy way to put the tiles together
I hope you can follow it from the photos below...
THE "EASY PEASY" TILE MAKING

Firstly, I ran the chipboard squares/rectanges through my Zyron to give them a sticky back. The ahesive backing is covered with that non stick white shiny paper you usually peel off when you are ready to stick down whatever it is you have Zyron'ed. Instead of peeling it off I left the chippies on that sheet and rolled the clay out straight over them with a rolling pin over the top as seen above.

secondly, LOL, I rolled back and forth till each chipboard piece had an even layer of about a 2-3 mm thick. Then used my scissors to cut along the edge of the chipboard for a nice straight cut.
Also by leaving the backing paper on the clay was less likely if at all sticking to the scissors.
The other thing that was great was if you angled the scissors in hard against the chipboard
edge you could create a "bevelled edge which made each tile look neater and niftier
(spell check says niftier is not a word to which I say...phooey!)
End product a blank bevelled edge clay tile ready to go...

Some of these tiles shown here were for another project, I used Tim Holtz distress stain
"wild honey"directly on the dried white clay I also used them to quick coat the colours inside the yellow and green compartments in the printers tray.
The distress stains and * Adirondack acrylic paint dabbers are dauber headed {LOL} that is,
they have a squishy soft sponge top applicator. They are awesome for an easy,
super quick colour coverage on anything!!!
These paints are my FAVE's I would have 2 in every colour
if a lotto win would be kind enough to come to me!!
(And yes as impossible as it is....
due to my enthusiasm for these, along with his other fine products
I have been known as MRS HOLTZ on occasion! }
Moving right along from there...
I stamped into each of my "pre fab" clay tiles, with the selected acrylic and rubber stamps. Then let the tiles dry, painted them either brown or green acrylic paint.
Then to finish off that "carved wood/embossed" look I picked up the stamped details by roughly rubbing over the painted tile with a metallic wax product called Rub n Buff. In the picture below the details stamped on the clay tiles that have the key and key hole on them are highlighted/emphasised by this creamy
Rub n Buff product giving them a gilded, antique or metallic look.

As "sus" as it sounds, I say little bit of Rub N Buff goes a long way (LOL).
I have know folk artists that have had tubes of rub and buff for over 10 years. Some people like to put a tiny dot on a cloth to use it, but I love to use my finger tip its more accurate and as an added bonus...makes hubby squeal and recoil when he see's my feral grotty hands! LOL
WARNING:
THE MUMBO JUMBO TECHNICAL STUFFS....
{ feel free to skim scroll down with speed if u need to ... }

The other technique I used was called Gel skin transfer similar to ordinary image transfer but applying and drying a layer of gel medium or similar to the front of the image and peeling the backing backing paper off to leave a translucent printed image.
This is great for creating mottled effects,image layering or here I have changed the tone of the original image to a more yellowed aged tone by mounting the "see through" image onto a yellow acrylic background. The image transfer technique reverses an image, this technique does not.
So that makes it perfect for type and gives the picture in this case a glossy protective coat too.
For some more info on these techniques either google or go HERE
Theres a million and one things you can do with air dry clay ....
I can show you another fetish that has started up since SCRAPTIVATE sent me clay...LOL
Art Dolls ...
here's one in the making
that will be visiting SCRAPTIVATE really soon and ...
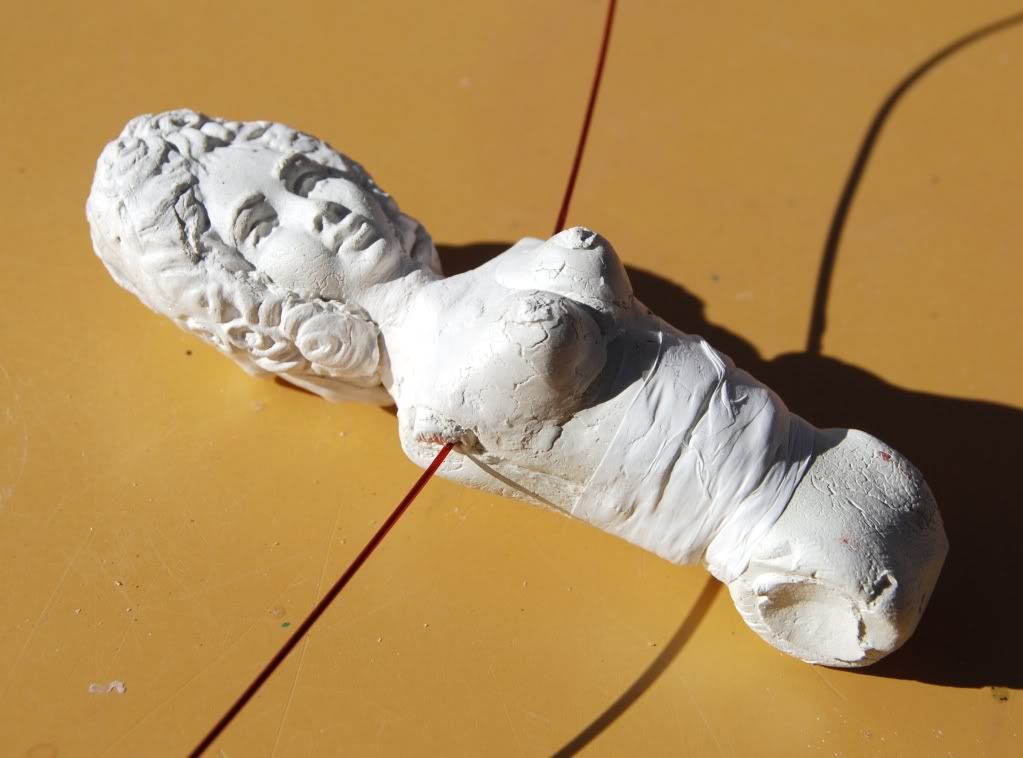
shes not the only one projecting and no they aren't real but the nipples are too cute eh?!!! LOL
Shes made with the same FIMO Air Dry Clay as the tiles here face using a "push" mould...


There are a number available at
SCRAPTIVATE...
for example:


These are TEN SECONDS STUDIO texture plates
that are usually used with paper or metal shim
but can be used to stamp into clay!
There are dozens of these lil gems in the Scraptivate shop
and I need one of each!!!
I don't need them... I should have them
see ...
cool tools for cool people! LOL
oh and click below to check out the ...
heaps of info and dont miss
TACO TUESDAYs VIDEOs
cause they are fun-ee!
okayeee so you can ...
WAKE UPPPPPP NOW!!!
***snigger***
my long winded post is over
so if you are reading this and not actually snoring...
THANKYOU, TELL YOUR FRIENDS N COME AGAIN!!!
:)

2 comments:
yeezy
yeezy supply
kyrie 5 spongebob
bape hoodie
kd 10
kd shoes
yeezy
curry 6 shoes
off white nike
bape hoodie
view publisher site check over here visit this page buy replica bags Learn More official statement
Post a Comment