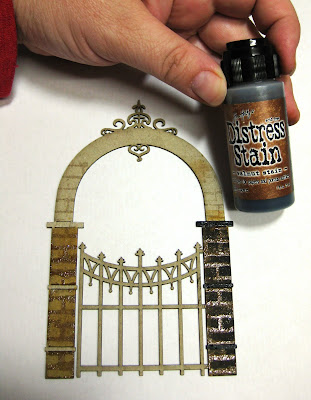
Here's a little step by step created around supplies from SCRAPTIVATE
Featuring Tim Holtz Distress stains (sigh love love love!)
Using a relief technique used with the...
by SCRAPWARE
The idea was to create a brickwork pattern on the chipboard to give it a more realistic look.
To start with I needed a Versamark water mark Ink pad or a glue pad or any clear embossing ink pad , thin masking tape or similar, clear embossing powder, a brickwork stamp and
two sheets of paper or as I have used here two non stick mats.
I masked out the capping on each pylon that's the little space in between each square of chipboard as it rises to form the archway. I slid the gate which I didn't want the pattern on under a sheet to protect it.
Stain ink pads offer a great quick way to cover chipboard.
Here I have used a Tim Holtz Distress stain ink pad scattered straw
pressing it down repeated to get the pylon area covered with colour.
After waiting for the ink to dry I then applied the clear watermark embossing ink to the brickwork stamp and stamped the image onto the chipboard pylons. you can see the pattern over stamped a little up onto the arch way in the above picture. Then sprinkle the clear embossing powder over the image you've stamped. If you stamped somewhere you didn't want the brickwork ( like I did! LOL) just don't put embossing powder on that area.* Tap off the excess powder, set the image by heating it with a heat gun.
*HINT: If you do ever get embossing powder where you would not want it....dont stress
just use a dry paint brush to brush it off!
When we use a heat gun on the clear embossing powder it melts turning into an enamel which sets hard and protects whatever colour is underneath, in this case the Scattered straw Distress stain colour.
Making it look like the mortar between the bricks
Once the clear embossing powder is heat set onto the image then I used a Tim Holtz distress ink dauber to dab on the brick colour. I used a walnut stain here it did dry a fraction lighter. The daubers are the easiest item to use to cover anything. They are ink in a bottle with a sponge head so you can just give something a light wash of colour or apply a couple coats to deepen the colour. All the convenience of ink and none of the mess of paint ...no brushes, water etc.
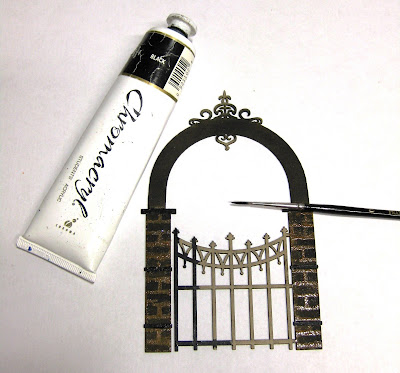
I removed the masking tape and painted the strips through the pylon, the archway and the gate with black acrylic paint. I used Chromacryl black paint but any black acrylic paint will be fine. Golden acrylic paints are a long lasting quality acrylic that many artists recommend. A black Distress Dauber could be used instead of paint! I also did fences to go with the gate on the final layout.
I had a plain dull light brown embossed paper, I wanted to use in the background of the layout. It wasn't dark enough or the colour brown I wanted so I gave that the the Tim Holtz Distress ink treatment too!
Step 1 was to cover the whole paper using a wild Honey stain let it dry or dry it off as I did with a heat gun. Then step 2 either brush lightly using a Walnut ink Tim Holtz Distress Dauber or use a blending tool (as seen below) to highlight the raised pattern on the embossed paper.
Sometimes a blending tool or ink pad is best for covering large areas and for blending colours...
This is a great tool and I have used it with both Distress ink pads and by dabbing ink from the Distress Daubers straight onto the foam blending tool sponge.
This is the finished layout. For a closer look checkout the gallery pages on the ...
If you wish to purchase or have any queries
about the products seen here contact the helpful friendly staff at...
:)


1 comment:
OMG this gate way is totally amazing,awesome work
Jen
Post a Comment