STEP BY STEP INSTUCTIONS
for
"SAM's REWARD BOX"
FEATURING: TWIDDLEYBITZ WAVE SHADOWBOX
Also using TWIDDLEYBITZ “Groove” ALPHABET &; a TWIDDLEYBITZ FENCE
“Sam’s reward box” - Created by Marcy smith
This was created to hang up in my 2 year old, car loving, nephews room to encourage him to use his “best” behaviour through the day. Everyday only if he can do what his mum asks of him, he will be rewarded. His
reward will be his mother bringing down the special car that sits in the frame allowing him to play with it for an extra special hour. This Idea could be carried through to include a special "polly pocket", a "my little pony" or even the Wii remote (my boys are you reading that!) if you're boy or girl would like something different to stay motivated! Positive reinforcement I think its called! LOL
1. Lay out all your pieces and find the back piece of the box paint edges and around the outsides. The inside of the piece will be covered in Patterned paper so wont need to be painted.
2. Paint box sides and end pieces.
TIP: If you use a paint dauber and the sponge tip dries out usually you push down on a piece of paper to get more paint to come out. Instead use a shiny surface, a piece of glass, a Teflon sheet or save the shiny rub on backing sheet or the backing sheet from a zyron that you usually throw out, and press down on those and instead of wasting the paint you dab out it doesn’t soak In like it does on paper and you can mop it up with the sponge tip of you dauber so you don’t waste a drop of paint.
3. I roughly painted around the wave chipboard frame front with a black paint dauber.
4. There are two approaches to covering a chipboard shape. The first, you can stick the chipboard down,
Trim the excess paper off and then repeatedly run a piece of sand paper or an emery board around the edges. The effect is the excess paper will come away to the exact edge of the chipboard, usually leaving a distressed edge.
For this wave box I traced around the chipboard front onto another piece of cardstock then cut it out. This became a template. The template gave me the curve of the wave used to trim the patterned paper just a little bit smaller so I could show the black painted edge on the chipboard wave front.
I inked the edges with navy blue ink pad and set aside. I stuck this patterned paper on after I put the box together because it made it easier to see where all the parts joined together
5. Take chipboard letters and paint them black I used my black paint dauber for this and a small paint brush to get into the smaller corners. Then I gave them a coat of dimensional magic which is like a thick gloss glaze that adds height and enhances the colour.
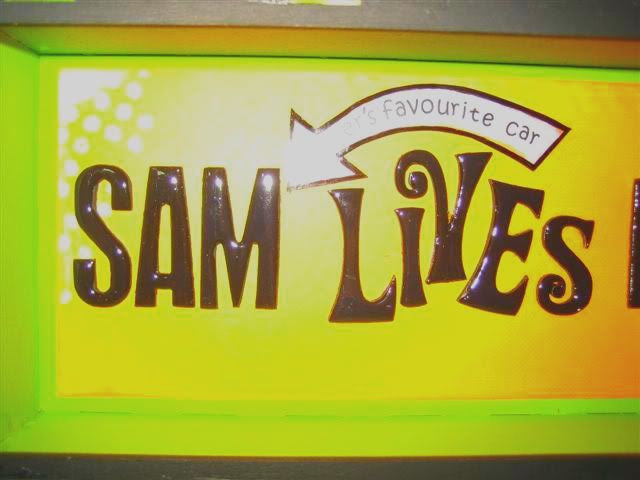
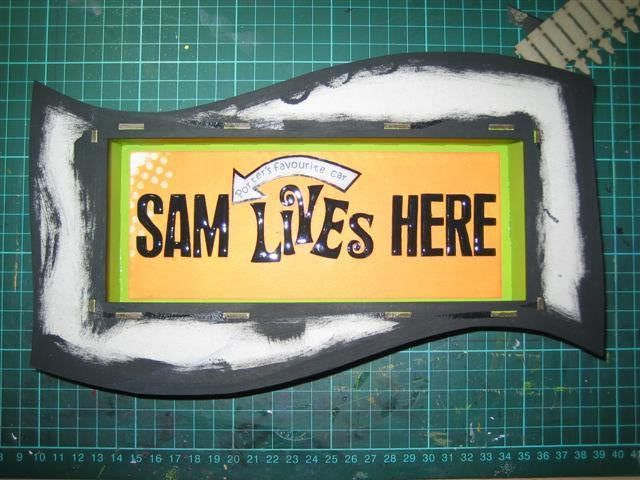
6. I cut and inked round an orange piece of Pattered paper that was 7 ½ x 19cms. Centre and adhere this to the green inside back of the shadow box. Stick lettering down at this time too. I cut an arrow out of transparency; dry brushed the back with white paint and drew round the outsides with black permanent marker to create the arrow outline. Then lastly added the rub ones text and stuck it into position.
7. Stick your box together by adding glue along the edge of each piece and fitting it all together. To ensure you have the hanging piece of chipboard exactly in the middle, draw a centre line on the hanging piece of chipboard and a centre line onto the back of the box and line them up when you glue the hanging piece down.
8. Stick down the front wave patterned paper. I placed mine down to reveal a black edge of chipboard that I drew a dashed lined along on the bottom edge to make a “road”.
I then painted the rear of the box you could have done this earlier at step 2. But I preferred to do it at this point because it’s a great way to cover up and excess glue that may have oozed out of the joined pieces of chipboard.
9. Creating the embellishments.
I cut some trees out of patterned paper and stamped a little car onto plain white cardstock then traced around them onto plain chipboard which cut just a little bigger then painted black. I did the same on the car to create a black outline round each embellishment. Then gave them all a layering of dimensional magic.
To make sure the car stayed in place and didn’t roll round when it was in the frame, I invented a little “thingo” (no idea what to call it! LOL) Using a Twiddleybits fence piece I sat a matchbox car on it and where the wheels go I cut a piece of the fence out so the car sits on this and the wheels don’t touch the frame locking the car in place.
10. The acetate backdrop that fits over the frame at the back, I made out of thick acetate. It is a little like transparency, only thicker and more rigid.
It comes in an A3 sheet but I cut it down to 20 x 30 cms.
11. I centred it over the back of the box. Then ruled around the box with a marker. Then cut that centre rectangle out. Tip make all the construction lines info that will help you for example,” top and bottom” written on the back of the acetate you can do this and them wipe it away with a tiny bit of Stazon ink cleaner on a cotton wool bud or piece of cotton cloth.
With the whole cut, the acetate should fit snugly over the back of the box.
12. I drew a construction line that showed where the wave front would go. Then used some green patterned paper scraps to create the hills and grass stuck it into place. On the front of the acetate.
Then using the stazon as described above erased the construction lines dry brushing and stamping in white acrylic paint to give the effect of the sky. All this painted work was done on the back.
Then I turned the acetate round to the front and using a masking process I repainted the edges of the acetate with white paint and once dried applied a rub onto the acetate and coloured in that “sun” with butterscotch alcohol ink.
Next I stuck the “cloud “, made from a sticker on plain white card then with dimensional magic over the top.
13. I returned back t the box and put the other embellishments onto the front.
Then slid the acetate over the back of the box it fit snugly but I used a little double sided tape just for insurance where you couldn’t see it.
Then hopefully if I was to do all those steps again I would have.....
GIVE IT A GO IT's REALLY EASY!!!!
:)


.JPG)
.JPG)
.JPG)
.JPG)
.JPG)
.JPG)
.JPG)


.JPG)
.JPG)
.JPG)
.JPG)
.JPG)
.JPG)
.JPG)
.JPG)
.JPG)
.JPG)
.JPG)
.JPG)
.JPG)
2 comments:
Marcy this is brilliant! Great idea and really well executed :)
Girl you ROCK with Tutorials!
This is fantastic! Clever clever girl!!
Post a Comment